This article is now too long. I need to split it up.
Introduction
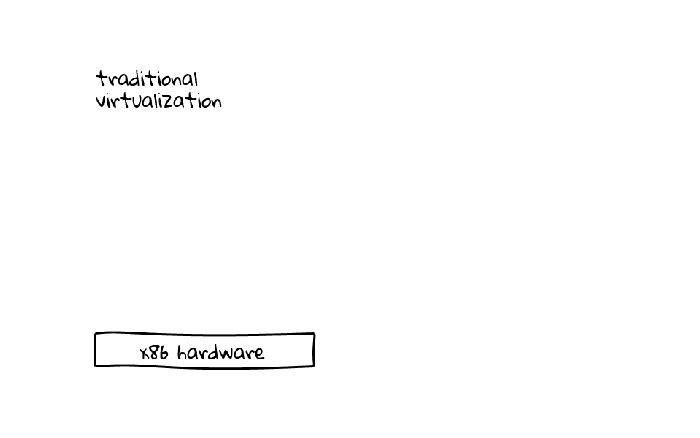
Below image shows the key difference between traditional virtualization and containers,
Why Use It?
LXC is in between a VM and a pure application container. It will take up more resources than a pure container, but unlike a VM use as much memory as needed. It will provide a full kernel and OS (albeit it must be Linux). Unlike a VM, LXC container will have access to the resources and speed of the hardware without needing to emulate hardware.
Some additional benefits,
- Understand Cloud - Many of the concepts here help you understand foundationally how Cloud works. There is also value in then using LXD to learn how to build your own bare metal, orchestrated Cloud infrastructure using technologies like Kubernetes.
- Half Step to Docker - Many people have explored Docker, but not yet ready to give up their ssh console. start here. Learning LXC, you'll also really understand how Cloud Foundry, Docker and generally Cloud concepts actually works.
- Understand Cloud Foundry - LXC is wrapped by Warden and the foundation for Cloud Foundry.
And for those who are debating Docker versus LXC, they are similar but do have distinguishing use cases.
What about LXD? LXD is another higher level layer on top of LXC that is more orchestration friendly.
The key enablement for orchestration is remote API calls and higher level functions. LXD still uses LXC under the hoods. As of Oct 2016, LXD 2.0 is now available and hooking up with orchestration via Juju.
This tutorial was originally written before LXD was ready for production and evolved to be the precursor to the LXD tutorial.
When an container is created (last updated with Ubuntu 16.04.1) it is tiny,
| Attribute | Size | Comment |
|---|---|---|
| Disk Space | 337 MB | That's the entire operating system because it can mount shared core kernel files from the Host. Better yet as Read-Only |
| Memory (externally viewing Container) | 12.96 MiB ~ 1.7 MB | Using lxc-info which excludes the shared kernal memory |
| Memory (Inside Container) | 5.6 MB | Smaller hence because the container leverages the host OS. Note, need to speak to LXC guys to understandy why external versus internal difference. |
| Processes (Inside Container) | 15 | Container leverages the host OS. |
Limitations
There are some kernel functionality that cannot be used inside of a container,
- Firewall
- Mounting External File Systems - Instead Mount in the host OS and then share to the container
Install
Install LXC,
sudo apt-get install lxc
LXC is changing pretty fast, so have an idea of the version installed with your distribution,
lxc --version
Note, this article was last tested with LXC 1.x.
Best to use your own Linux machine, but if in a pinch, you can try it out on the Linux Containers website for free.
Create Regular Privileged Container
The simplest to implement container is a privileged container. In other words, the user and process running the container is root. This is not as bad as it seems from a security perspective and easiest to manage (so far). Tin to talk to Dickson to find out if Solaris (which is more mature with container technology) started using unprivileged and if so will look into that next for Linux.
Container Derived from Image File Downloaded to Base OS
This draws the files from the existing image matching downloaded from the Base OS to make your container. Note the image file must be compatible (for now) with the Base OS. I observed it may also be looking at details of your Host OS as the process creates accounts in the image that matched Host OS. The image folder was created/downloaded during the lxc setup and resides in /var/cache/lxc/trusty/rootfs-amd64. The template file to create the container resides in /usr/share/lxc/templates/,
The --name specified will also be the container's name.
sudo lxc-create --template ubuntu --name my-container
Checking cache download in /var/cache/lxc/trusty/rootfs-amd64 ...
Installing packages in template: ssh,vim,language-pack-en
Downloading ubuntu trusty minimal ...
I: Retrieving Release
I: Retrieving Release.gpg
...
I: Resolving dependencies of base packages...
The rootfs-amd64 folder is only 384MB and was created when lxc was installed. The OS version will match your Host OS.
You may also download additional LXC image templates which may be different distributions (for example, OpenSUSE, Cent OS, Fedora and Arch Linux) and various versions of your Host OS.
You can see your new container,
sudo lxc-ls --fancy
NAME        STATE    IPV4  IPV6  AUTOSTART
------------------------------------------
app  STOPPED  -     -     NO

# look at the stopped container
sudo lxc-info --name my-container
Name:           my-container
State:          STOPPED
Sparse Container from Host OS
Not sure if this functionality exists yet. Solaris has a concept of a sparse root zone which I would call here sparse container. The idea to reduce scope overhead so that aside from basics (home, opt, temp) the rest of the file system is actually mounted as read-only from the Host OS. In this model we have tighter security with minimal packages.
File Structure
You will need to use sudo or root to view the directories. I use root,
sudo su - # log into root
There are 3 key files,
/var/lib/lxc/<container name>/config # used to configure container
/var/lib/lxc/<container name>/rootfs # container file system (to do: understand how permissions uid matches)
/var/lib/lxc/<container name>/fstab  # controls mounting so you can share folders btw host OS and container

/etc/default/lxc-net # controls general network settings (need to confirm)
See lxc.conf(5) for additional configuration options on the above files.
Container Networking
By default, LXC creates a private network namespace for each container using a DHCP server (dnsmasq), a NAT server (package name?) and configures IP Tables masquerade entries for outbound network access.
In other words, containers exist within a private network, may see each other, pull network data to whatever the host can access, but nothing outside aside from the host itself will see these servers. A good analogy is your home network behind 1 public IP. Your desktops can see each other, pull data from the Internet, but the Internet cannot see your systems.
Of course, you may expose containers to the hosts's network.
Enabling LXC DNS Resolution
By default, the containers can only see each other by IP addresses. DNS resolutions by default is not enabled.
I'm not going to show how to fix this because we will get this out of the box when graduating to using LXD.
Static LXC Assigned IP
When working with servers, without orchestration, it is best to use static IPs. This should be your first step if seriously using containers for production use. By default, LXC assigns an internal set of IPs within the range of 10.0.3.2 to 10.0.3.254 which is defined in /etc/default/lxc-net.
Change the range and enable reservations in /etc/default/lxc-net. Start by backing up per Bonsai Framework convention,
sudo cp /etc/default/lxc-net /etc/default/lxc-net.ori
First change the range (LXC_DHCP_RANGE) and the maximum lease # (LXC_DHCP_MAX) to make available 10.0.3.2 to 10.0.3.99 for static assignment,
LXC_BRIDGE="lxcbr0"
LXC_ADDR="10.0.3.1"
LXC_NETMASK="255.255.255.0"
LXC_NETWORK="10.0.3.0/24"
LXC_DHCP_RANGE="10.0.3.100,10.0.3.254"
LXC_DHCP_MAX="155"
There are two keys to change, LXC_DHCP_RANGE and LXC_DHCP_MAX,
Somebody write a sed edit command here so fast and less room for errors.
Second, enable Reservations - Remove the # symble to enable "LXC_DHCP_CONFILE=/etc/lxc/dnsmasq.conf".
# Uncomment the next line if you'd like to use a conf-file for the lxcbr0
# dnsmasq.  For instance, you can use 'dhcp-host=mail1,10.0.3.100' to have
# container 'mail1' always get ip address 10.0.3.100.
LXC_DHCP_CONFILE=/etc/lxc/dnsmasq.conf
Create and edit the /etc/lxc/dnsmasq.conf,
# Specify static IPs per container name or mac address.
# Addresses should be outside of range in /etc/default/lxc-net (10.0.3.100 to 10.0.3.254)
# Once setup these servers will be able to see each other by hostname assigned here.
dhcp-host=web,10.0.3.10
dhcp-host=app,10.0.3.20
dhcp-host=database,10.0.3.30
Specify static IPs per container name (you can also use the container's mac address in situations of multiple network interfaces) (I have not tried or tested yet). To avoid conflicts, make sure the static IP addresses are outside of the range specified in /etc/default/lxc-net. In case of multiple ip addresses look at LXC Advanced Networking.
You need to shutdown your containers and then restart the Host OS or flush the DNS Mask,
So first shutdown all your containers (Aug 2016, there is an issue that lxc-net does not restart unless all containers are shut off). Then restart lxc-net,
# Tried this and it did noot work http://seminar.io/2014/07/27/dns-resolution-for-lxc-in-ubuntu-trusty/
sudo service lxc-net stop
sudo service lxc-net start
The other option is to shutdown all containers and restart the host operating system.
Make sure everything restarted fine without errors. I had run into forgetting to change LXC_DHCP_MAX which resulted in lxc-dhcp not starting,
# Search boot log for errors,
... to put here ...
The nice thing about this approach is that the servers within the private network can see each other by assigned hostname. Try pinging by hostname and it will respond correctly. In the case two network cards though, there is some routing work that I have yet to figure out.
You may alternatively set the container OS itself to use static using the interfaces file.
Making Containers Available on the Network
Containers may also be made available on the larger network which is covered in 5.1 LXC Advanced Networking - Exposing Containers to the Network.
Start Container
This starts the container as a process,
# start the container
sudo lxc-start --name my-container --daemon

# look at the running container
sudo lxc-info --name my-container
Name:           my-container
State:          RUNNING
PID:            3553
IP:             10.0.3.135
CPU use:        0.59 seconds
BlkIO use:      384.00 KiB
Memory use:     6.45 MiB
KMem use:       0 bytes
Link:           vethBNKT75
 TX bytes:      3.08 KiB
 RX bytes:      3.27 KiB
 Total bytes:   6.35 KiB
For troubleshooting, you may omit --daemon which will run the containers as an actual program where you can see the container booting up.
Logging In
Console
Replicate loading console,
sudo lxc-console -n my-container
Defaults for the template image are,
user = ubuntu
pass = ubuntu
To detach, CTRL+a, followed by ‘q’.
Make to change the password for the default user or delete the default user when you create your own accounts.
Simulate Terminal
There is another way of getting in (good for initial setup without default accounts or emergencies),
sudo lxc-attach -n my-container # Takes you right to root after a fresh install.
lxc-attach is used to execute an arbitrary command inside a container that is already running from outside the container. Because nothing was specified, you end up running bash inside of the container.
Container Management Key Commands
Here are some of the key commands for container management,
# stop
sudo lxc-stop --name my-container

# destroy
sudo lxc-destroy --name my-container

# run a command inside of a containers (good for orchestration)
# In this example, free command is run inside of the container.
sudo lxc-attach -n my-container -- free
There is more to research parked below,
# snapshot
# rename
Cloning a Container
One of the most exciting aspects of containers is being able to clone (duplicate).
Clone
Shutdown (not entirely sure if needed but I do as principle) your container and clone from the host,
# clone, but you still have to manually change the host file
sudo lxc-clone -o original -n new
The clone command copies the filesystem and also does some necessary house keeping,
- Update the host name
- Generate new unique mac address for your network card
If you want to just try things you, you will want to look at snapshots.
Clear Out Old Data
Log Files
If you need to be enterprise class, clear out your new cloned containers log files which will reference the original container hostname. Here is an example search on a relatively new container,
sudo su -
find /var/lib/lxc/t02app/ -type f | xargs -I{} grep -li "t01app" {}
/var/lib/lxc/t02app/rootfs/var/lib/dhcp/dhclient.eth0.leases
/var/lib/lxc/t02app/rootfs/var/log/auth.log
/var/lib/lxc/t02app/rootfs/var/log/syslog.1
/var/lib/lxc/t02app/rootfs/var/log/kern.log
/var/lib/lxc/t02app/rootfs/var/log/auth.log.1
/var/lib/lxc/t02app/rootfs/var/log/syslog
/var/lib/lxc/t02app/rootfs/var/log/kern.log.1
/var/lib/lxc/t02app/rootfs/etc/ssh/ssh_host_dsa_key.pub
/var/lib/lxc/t02app/rootfs/etc/ssh/ssh_host_ed25519_key.pub
/var/lib/lxc/t02app/rootfs/etc/ssh/ssh_host_ecdsa_key.pub
/var/lib/lxc/t02app/rootfs/etc/ssh/ssh_host_rsa_key.pub
To clear them,
cd /var/lib/lxc/t02app/rootfs/var/log
# this does not work yet...
foreach ii ( `find . -type f` ) foreach? cp /dev/null $ii foreach? end
# delete gz files
There's more... user history...
Regenerate SSH Host Keys
Next boot up your container, log via the lxc console (is less steps) or ssh with a sudo enabled account and change your SSH host keys,
sudo rm /etc/ssh/ssh_host_* # delete original keys
dpkg-reconfigure openssh-server # generate new keys
If you chose to log in using ssh, you will want to log out and update your fingerprint file otherwise you will receive a "REMOTE HOST IDENTIFICATION HAS CHANGED!" error and not be able to ssh in. Different ways of doing this. On a Unix, Linux or Mac OS X operating system,
ssh-keygen -R remote-server-name-here
Mounting a Network Folder
You can't at this moment (March 2016) and I understand this is because it is a shared kernel issue. Solaris does not allow this either if I recall.
Instead use your host to mount your network folder and then share your host folder as described in the next section.
Share Folders with Host
In this example, we want to mount a shared directory from the host system to be accessible to one or more containers,
the container, the directory = /opt/mount-host/movies
You may actually use the same directory name and path for both host and container, but I have kept them different for clarity.
While in the lxc container, create your directory and setup any permission you may want to set and shutdown the container,
cd /opt
sudo mkdir mount-host
sudo chown serveradmin:staff # make accessible to the serveradmin user and staff group
sudo shutdown -h now # shutdown the container
In the host either create the folder (you may use any user because root is the process accessing), but I use sudo. Note the folder you choose may also be a mount over a network share.
From the host modify the config files. In this example it is /var/lib/lxc/my-container/config and add the following line,
lxc.mount.entry = /opt/lxc/shared-for-my-container/movies /opt/mount-host/movies none bind.rw 0.0
Not sure if the order matters, but I usually place under the lxc.mount entry. The bind.rw is a reference to read and write which you may adjust accordingly for example bind.ro would be read only.
I believe multiple containers may use the same host folder but you might start confusing yourself so suggest using your directory structure to keep track.
If your host is mounting another folder (ie a network share). You must mount in your host first then start your container.
Moving Container to New Host
... (this will probably be a separate article)
https://insights.ubuntu.com/2016/04/01/lxd-2-0-image-management-512/
https://www.stgraber.org/2013/12/20/lxc-1-0-blog-post-series/
Setting Up Zero Footprint 32-bit Java on LXC 64-bit
By default, the apt-get packages inside of the the containers only use 64-bit architecture,
sudo dpkg --add-architecture i386
sudo apt-get update
Then follow-up with installing the proper dependencies, but not sure if I need to install in the host... need to try this out in a VM.
Setup Name Resolution on Host
The containers know each other by name. However, the host has no awareness. This should be resolvable by adjusting the DNS resolution. However, first check if this is an issue that's already resolved in later implementations of Ubuntu (I think 17 has it solved) and also if LXD resolves this automatically.
References
Good overview of lxc - https://www.flockport.com/lxc-vs-docker/
Initial article reviewing - https://linuxcontainers.org/lxd/introduction/
Official Ubuntu Docs - https://help.ubuntu.com/lts/serverguide/lxc.html#lxc-installation
Changing dnsmasq IP range - http://skyhigh71.github.io/2013/09/29/change_ip_address_range.html
Still to read - appears to be distilled LXC theory - http://the.binbashtheory.com/before-you-start-with-lxc-and-docker/#more-26
How to change ssh host keys - http://www.cyberciti.biz/faq/howto-regenerate-openssh-host-keys/
Clean up log files - http://serverfault.com/questions/185253/delete-all-of-var-log
Clean up log files + more - https://lonesysadmin.net/2013/03/26/preparing-linux-template-vms/
Animated Gif of Traditional Virtualization vs Container - https://leandromoreira.com.br/2016/02/06/from-lxc-to-docker-machine-and-cloudery/
DNS Resolution - http://seminar.io/2014/07/27/dns-resolution-for-lxc-in-ubuntu-trusty/
Running X Windows in LXC - http://unix.stackexchange.com/questions/18003/linux-lxc-deploying-images-with-tiniest-possible-x11
Good overview of namespaces and resource groups used to power container technology - https://content.pivotal.io/blog/cloud-foundrys-container-technology-a-garden-overview
LXC and LXD using host bridge - https://insights.ubuntu.com/2015/11/10/converting-eth0-to-br0-and-getting-all-your-lxc-or-lxd-onto-your-lan/
1 Comment
Tin Pham
Yong, I noticed you added lxc1 for Ubuntu 16. Good point, but since the API's should be backwards compatible I've removed it and add a note here.