TBD - This article can also be improved to use the newer conventions in Tomcat server names.
Introduction
It is often useful to have Apache front Tomcat.
There are two main methods of doing this,
- Apache Tomcat Connector - tried and true
- Reverse Proxy - relatively new (Nov 4, 2009) and part of Apache
In our Enterprise environments we currently only use the tried and true Apache Tomcat Connector.
The Apache Tomcat Connector is often called by its binary file mod_jk which I will use from this point onwards.
Install mod_jk
There are two different methods of installing mod_jk. The simper being using apt-get if you have Ubuntu.
Using apt-get
With Ubuntu you can have mod_jk almost automatically install for you via,
sudo apt-get install libapache2-mod-jk
Running this command results in the following,
- /usr/lib/apache2/modules/mod_jk.so (this will not always be the most current - you can see the current version by looking at the package info)
/etc/libapache2-mod-jk/workers.properties (create a generic workers.properties file for generic setup of Tomcat 6.x)
- /etc/apache2/mods-available/jk.load (file which loads the mod_jk module)
- /etc/apache2/mods-enabled/jk.load (symbolic link which starts the mod_jk module)
- /etc/apache2/mods-available/jk.conf (defines how mod jk should run - if using Ubuntu 11 or lower you must manually create this file)
Manually Installing mod_jk
I often have to do this on Solaris or alternative operating systems so the manual process of installing mod_jk is good to have handy.
Enable mod_jk
The installer will also enable the modules in Apache essentially running below command for you,
sudo a2enmod jk
sudo /etc/init.d/apache2 restart # enable the change
This basically creates symbolic links for you in the /etc/apache2/mods-enabled directory. The two symbolic links will be,
- jk.conf
- jk.load
You can verify that the module loaded properly,
sudo apache2ctl -M | grep jk
# result,
 jk_module (shared)
jk_module in the resulting output shows that the module loaded properly.
Configure Mod_jk
workers.properties Configuration File
Edit or create (in the case of a manual setup) /etc/libapache2-mod-jk/workers.properties which defines how Apache will pass the traffic to Tomcat.
This is the minimal configuration,
# Configure environment slash... ps=\ on NT and / on UNIX
ps=/

# Define workers using ajp13
worker.list=tomcat_0_worker

# Set properties for worker
worker.tomcat_0_worker.type=ajp13
worker.tomcat_0_worker.host=localhost
worker.tomcat_0_worker.port=8009
worker.tomcat_0_worker.lbfactor=1
In the above case are creating a worker called tomcat_0_worker for a web application to connect to Tomcat0 which will run in the www.krypton.com virtualhost. Notice the host=localhost line in yellow. This should point to the server that Tomcat is running on. In this case, we are have Apache and Tomcat on the same server so we use localhost.
If you did an automatic setup a default working workers.properties was generated with the same options as above except the worker is called ajp13_worker (see line 61), and the file is interspersed with comments. Shown below is the default workers.properties as of April 7, 2011,
To keep the example simple I have not added load balance support yet. If you want load do load balancing with a second tomcat instance, a simple configuration would look like this,
# Define workers using ajp13
worker.list=loadbalancer

# Set properties for worker
worker.tomcat_0_worker.type=ajp13
worker.tomcat_0_worker.host=localhost
worker.tomcat_0_worker.port=8009
worker.tomcat_0_worker.lbfactor=1

# Set properties for worker
worker.tomcat_1_worker.type=ajp13
worker.tomcat_1_worker.host=localhost
worker.tomcat_1_worker.port=8109
worker.tomcat_1_worker.lbfactor=1

# Set up load balancer using ajp13 workers
worker.loadbalancer.type=lb
worker.loadbalancer.balance_workers=tomcat_0_worker,tomcat_1_worker
The load balancing uses weighted round-robin with sticky sessions. The lower the lbfactor number the less weight and as such the less work done by the worker. In our example, since both Tomcat0 and Tomcat1 have a factor of 1 the load balance is split about 50/50.
Tin's Adjustments
What you have so far should work. However, if you want to match what I use in production I also made the following adjustments.
Look for this block and comment out.
# Tin: This directory does not exist.
#
# workers.tomcat_home=/usr/share/tomcat5
Look for this block and comment out,
Ubuntu 12.04.3 LTS no longer has this line.
# Tin: This directory does not exist.
#
# workers.java_home=/usr/lib/jvm/java-gcj
If someone can let me know why we would want to have these properties let me know.
Configure Tomcat AJP
Tomcat out of the box already has AJP enabled and listening on port 8009 with default parameters in server.xml.
The default parameters are generally sufficient for most environments. For more advanced environments you should read the AJP Connector documentation at Apache Tomcat Configuration Reference.
Configure Map Points in Apache
This last step will be different depending on if you are using virtual hosts or not.
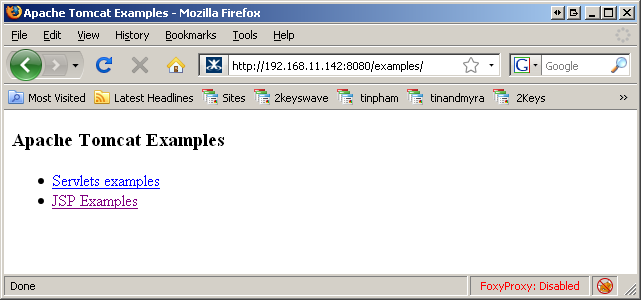
First verify that you can hit the examples application without mod_jk by directly hitting the Tomcat0 server running on port 8080.
If you have been following my instructions to setup Ubuntu you probably have the firewall setup so do not forget to open up port 8080 temporarily for this test.
Launch a browser and to to, http://www.krypton.com:8080/examples/. You should see the following page show up.
In our examples we will be using virtual hosts. Once you get virtual hosts working, add a reference to the worker entry to your virtual host file.
JkMount /examples/* tomcat_0_worker
JkMount /examples tomcat_0_worker
Note that examples is written twice, the reason for this is so that it will recognize the command the same if the person enters /examples or /examples/etc
The above example uses tomcat_0_worker for the name of the worker. This name depends on what value was used in workers.properties file for worker.list. In this article we had two other examples,
ajp13_worker (if you went with the default generated workers.properties file) or loadbalancer (if you opted to follow the load balancer example).
If you are not using virtual hosts you can add the above to /etc/apache2/sites-enabled/000-default.
If you wanted to use the load balancer you would change Tomcat0 to loadbalancer.
Restart Apache
Finally you must restart Apache for the changes to take effect.
sudo /etc/init.d/apache2 restart
Now you should be able to view the examples site without specifying port 8080, http://www.krypton.com/examples/
Excluding Mod_jk
In the situation where jkmount is using a wildcard as a context root (I don't presonally recommend this approach) an exclude can be added to stop jkmount from affecting the directory.
First edit the virtual host file in /etc/apache2/sites-available/ with your favorite editor and add the following line after the jkmount
SetEnvIf Request_URI "/directory/*" no-jk
Make sure to restart your apache for this change to take affect.
Now all files and folders under "directory" will not be affected by mod_jk
This option is not recommended but in some situations is required
Resources
http://www.gustavomejia.com/blog/2008/03/02/1204455261015.html - seems to have decent instructions using ubuntu apt-get to set up mod_jk. Don't understand the java_home thing though.
http://wiki.zimbra.com/index.php?title=Zimbra_with_Apache_using_mod_jk - article from Zimbra.
http://thoughts.contegix.com/tag/mod_proxy_ajp/ - interesting comparison of Mod Proxy AJP versus Mod JK.
1 Comment
Tin Pham
When Roderick went over this he found it confusing that the instructions on the workers.properties mixed simple with the advanced load balancing.
So will separate out the load balancing instructions into a sub document the reader can click to.