This Page is a work in progress
Bitvise SSH Client
BitVise SSH Client Tunnelier is the recommended client for key generation on Windows.
Generating your private key:
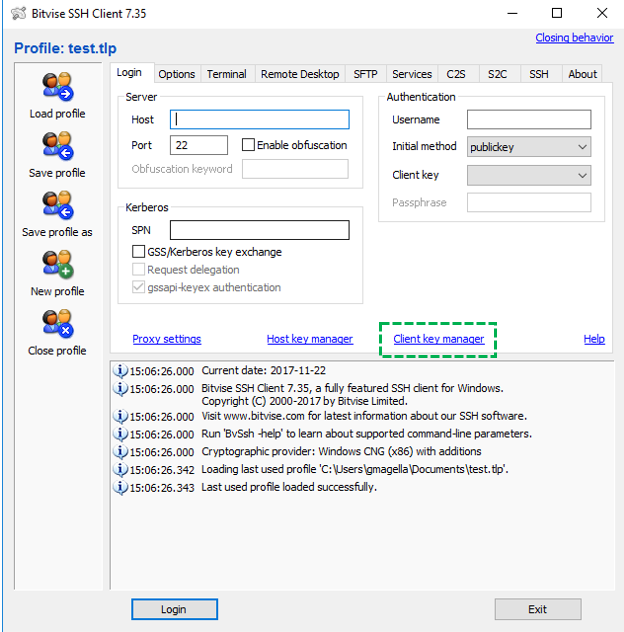
Open BitVise SSH Client Tunnelier.
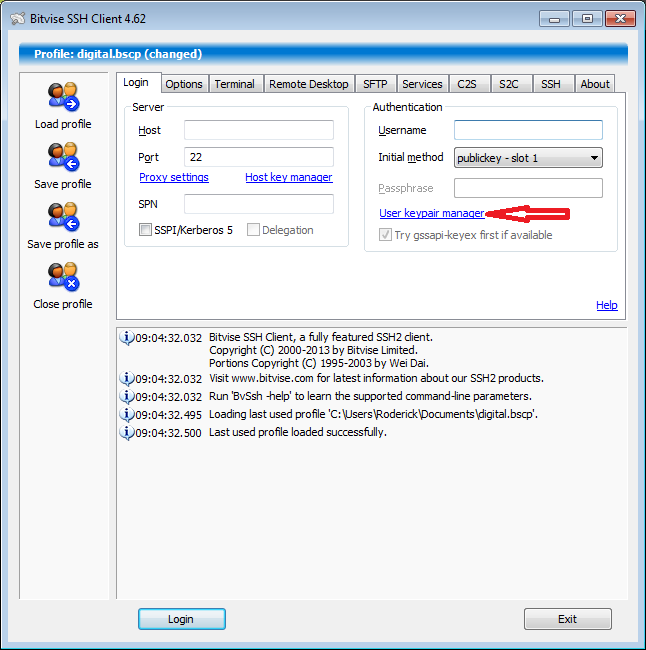
Click in “Client Key Manager”
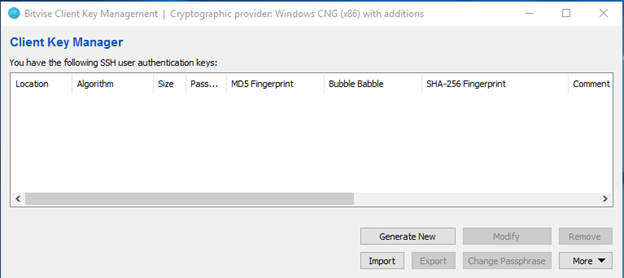
Click on GENERATE NEW:
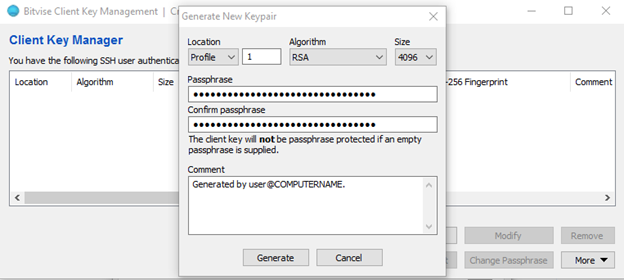
Select RSA, Size: 4096 and (Optionally) enter a good passphrase.
Note: this passphrase will give anyone access to our private key, it’s recommended that you keep it safe in some sort of encrypted vault like Keepass.
After you generate it, you should export the public key and private keys
Export the private key in the proper format:
Click in Export, Select “Export private key” and “PuTTY format”

NOTE: Do not share this file with anyone. This is your identity
Enter the passphrase for the key and make sure “Use Existing Passphrase” is selected so the key will be passphrase protected.
Point to a directory and save the file.
Next, lets import it to use in PuTTYNG for use with mRemoteNG.
Click on Tools, Options.
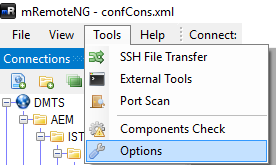
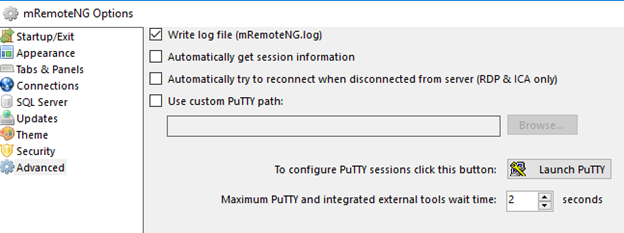
Click in Advanced…. Launch PuTTY
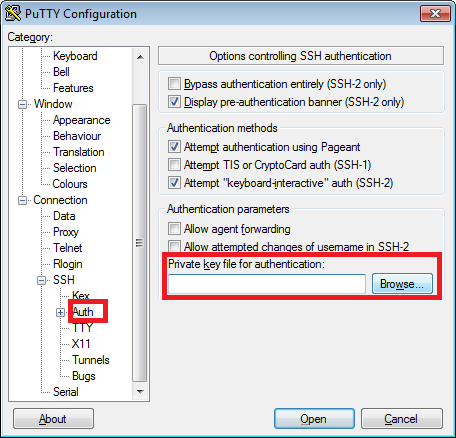
Scroll down, expand Connection -> SSH - > Auth and click in “Browse” to locate your private key.

Scroll back up and click on Session…. Select Default Session and click SAVE.
Optionally you can set up another Session Name, so you wouldn’t change your default session settings.
Optionally you can also load a session and save it with another name so you can change only a few configuration. E.g: change the background of SSH for production servers for improved awareness.
Optional Step: set logging for audit purposes:
Go to Session…Logging
On the first section select “Printable output”
On Log file name type: <ROOT_FOLDER>\SSH\LOGS\putty_&Y&M&D&T_&H.log
Note: please replace <root_folder> by a location/folder on your computer, ex: “e:\SSH”
Check “Always append to the end of it” for existing log files.
Check “flush log file frequently”.
Click back in “Session”, select “Default Settings” and click in SAVE.
Properly exporting the Public Key
Your public key is the key you want to share with the server owner, so SSH will be able to authenticate you.
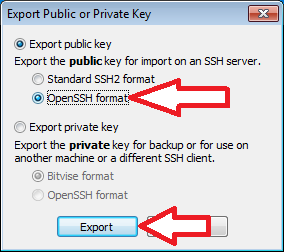
In Bitvise you can export two types of public keys,
- Standard SSH2 format - This is for the Bitvise client
- OpenSSH format - This is for adding to servers for access
This export option can be found by opening Bitvise selecting the User keypair manager.
Select the Key you want to export and click Export...
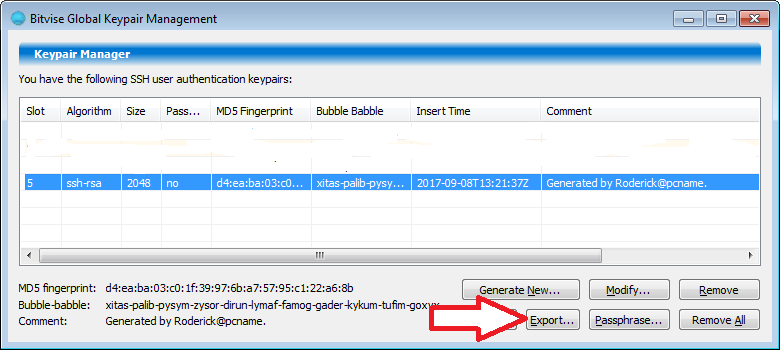
Select OpenSSH format and click Export
Name the file and save it.
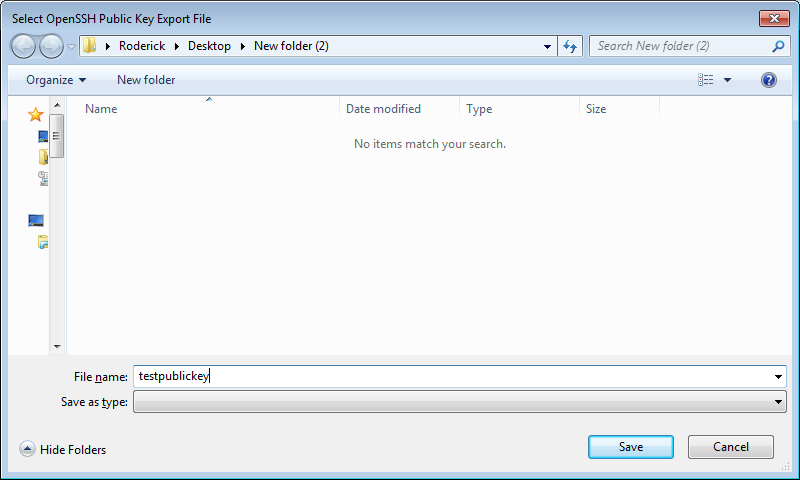
Send the file or the contents to the Server Administrator to add your key onto ~/.ssh/authorized_keys
Puttygen
It is not recommended to use Puttygen to generate keys. The software has not been updated in a very long time. Instead, for Windows, look at BitVise SSH Client Tunnelier or a current Unix/Linux system.
Run the puttygen.exe if you do not have it you can download it here.
Here you can change the key type and length for this example we will use default. For more information on industry standards refer to this page.
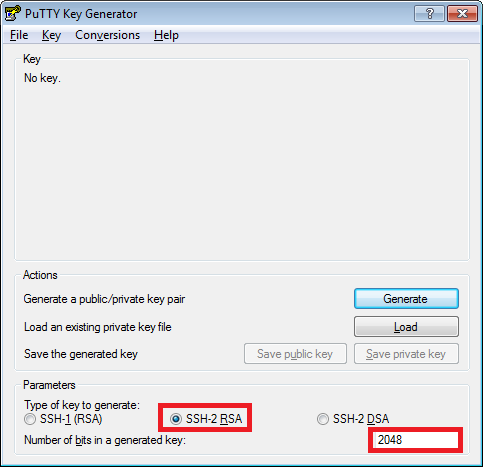
Click Generate and follow the instructions of moving your mouse in the space till the bar is filled.
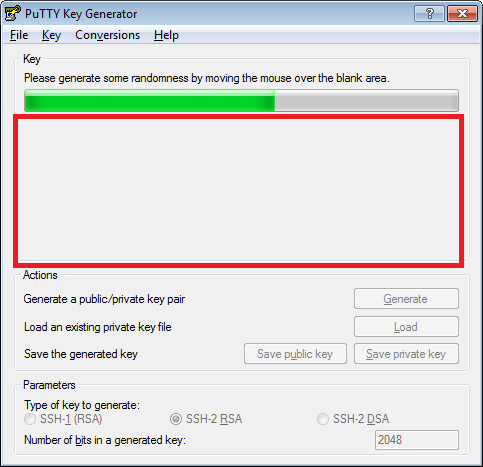
Once finished your public key will be displayed as well as some options to set a passphrase and save your keys. The box at the top is your public key that you would copy into your authorized_keys file in the ssh directory. You can also save the public key and send it to others to grant you access to servers.
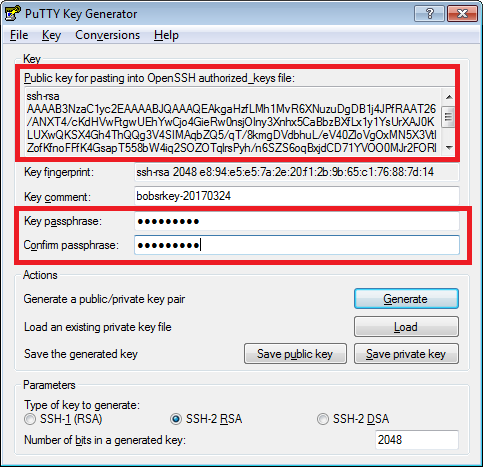
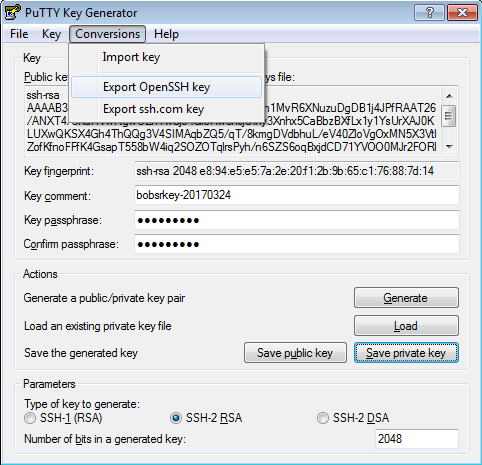
Note when you save the private key its in format ".ppk"(Putty Private Key) this will only work in the putty client. If you need a private key without the putty format you can find it under Conversions.
The location to load your key in the putty client is in Auth on the left side scroll down and select Auth then browse for you key.